

The Benefits of Non-Slip Tape
When it comes to poolside safety, there’s no compromise. Non-slip tape, also known as anti-slip tape, is the ultimate solution to enhance traction and reduce slip and fall accidents. Whether you need outdoor anti-slip tape for pool areas or staircase anti-slip tape for steps leading to the pool, our products are engineered for durability and longevity, providing optimal safety in various weather conditions.
Can Non-Slip Tape be Used on Ceramic Tiles?
Many pool owners wonder if non-slip tape is suitable for ceramic tiles. Rest assured, our waterproof anti-slip tape and non-slip rubber tape are specifically designed to adhere securely to ceramic surfaces, providing an extra layer of safety around your pool edges. Its reliable grip ensures that even anti-slip tape for shoes works effectively, offering peace of mind for pool-goers of all ages.

peva clear stair non slip tape
Non-slip Bathroom Showers Strips Adhesive

PEVA anti-slip tape for bathroom

Night light PVC Grip Tape Anti Slip Stairs Outdoor

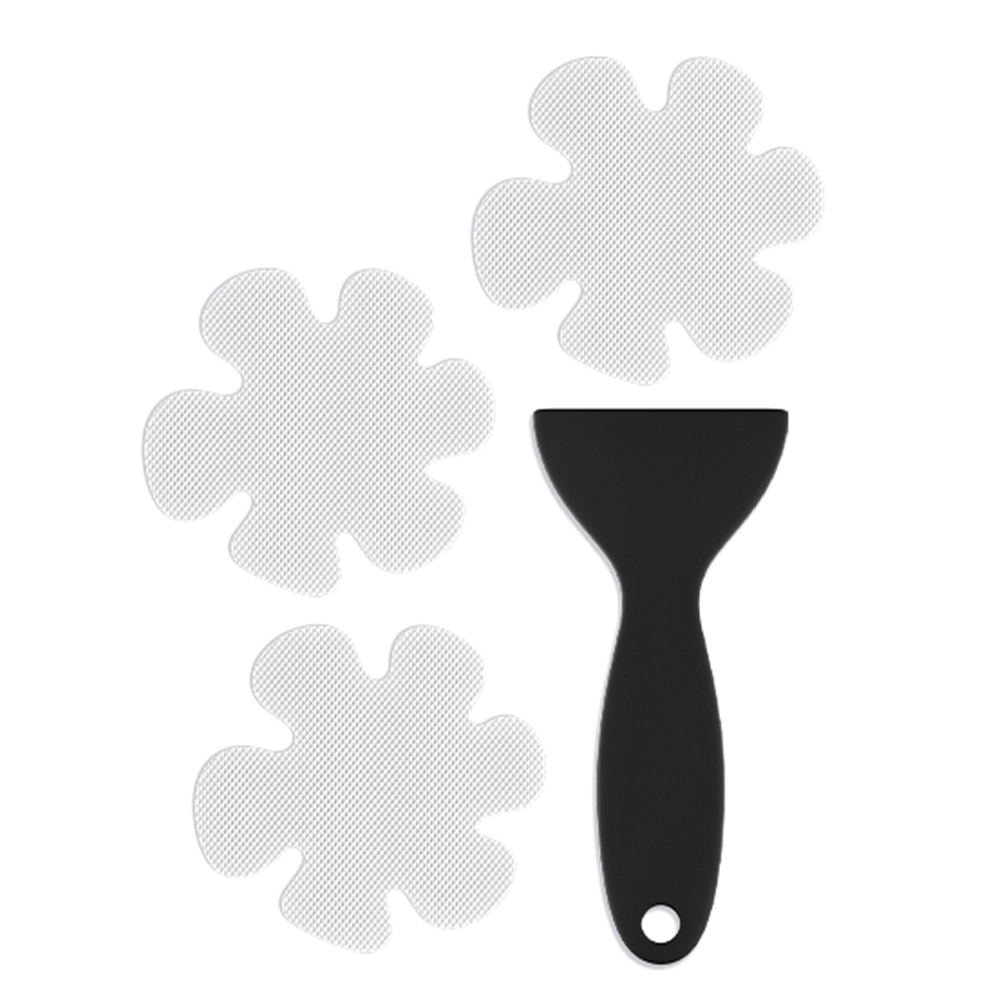
PEVA Non Slip Tape Bathtub Stickers Flower

Customizable (die-cut graphics) white PEVA rubber anti-slip tape
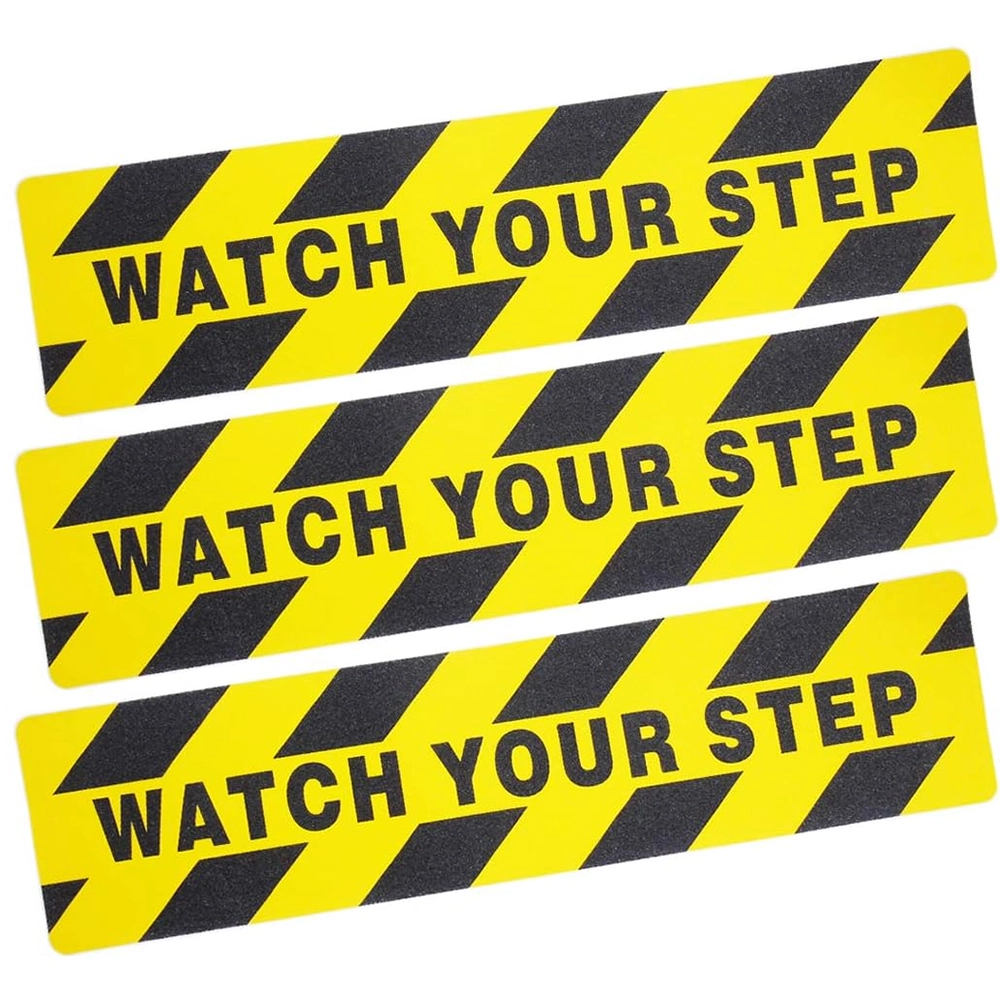
Warning Anti Slip Watch Your Step Abrasive Tape
How to Install Non-Slip Tape step by step?
1.Test that the safety tape is adhesive before installation by just peeling back a small section.
2.Temperature of the surface should be above 55˚
3.Apply to smooth surface. Repair application area to insure it is smooth by filling in any cracks or depressions. Porous surfaces should be sealed; Never apply the safety tape over grout lines
4.Remove oils, dirt and flaking paint using a industrial cleaner
5.Be sure any soap residue is removed by flushing the surface.
6.Surface must be completely dry.
7.When Cutting the Safety Tape to size we suggest rounding the corners.
8.When peeling off paper backing try to keep fingers off the adhesive.
9.Position and press into place pushing from the center out to the edges to remove air bubbles. A rubber hand roller helps to get maximum adhesion.
10 The area can be used immediately after the tape is applied.
The surface of the tape itself can be cleaned as needed using a mild detergent cleaner.
With our range of non-slip tapes, including waterproof anti-slip tape, non-slip rubber tape, and staircase anti-slip tape, installed around your swimming pool, you can enjoy worry-free relaxation and recreation. The benefits of these high-quality products extend to their usability on ceramic tiles and even underwater. By following the simple installation and maintenance steps, you can create a safer environment for swimmers of all ages, providing peace of mind and allowing everyone to make the most of their pool time with confidence.
Ensuring safety in work environments is crucial, and anti-slip tape plays a vital role in preventing slips and falls. At www.aiyatape.com, we pride ourselves on offering high-quality anti-slip tapes that not only enhance safety but also provide durability and ease of installation. Follow our step-by-step guide to installing anti-slip tape and discover why www.aiyatape.com is your go-to source for top-notch products.
Step 1: Preparation
1.1 Clean the Surface
Before installing the anti-slip tape, ensure the surface is clean, dry, and free of any dirt, grease, or debris. Use a cleaner suitable for the surface material and allow it to dry completely.
1.2 Measure the Area
Measure the area where you plan to install the tape to ensure you have the correct size. www.aiyatape.com offers various widths and lengths to fit your specific needs.
Step 2: Cutting the Tape
2.1 Measure and Cut
Using a sharp scissors or utility knife, measure and cut the anti-slip tape to the desired length. Ensure you cut straight and accurately to avoid waste.
Step 3: Applying the Tape
3.1 Peel and Stick
Peel off the backing paper from the anti-slip tape. Start at one end and carefully apply the tape to the surface, smoothing it out as you go to avoid bubbles or wrinkles.
3.2 Use a Squeegee
Using a squeegee or a hard, flat object, press down firmly on the tape to ensure it adheres well to the surface. This step is crucial for a secure installation.
Step 4: Trimming and Finishing
4.1 Trim Edges
Use a utility knife to trim any excess tape around the edges for a neat and professional finish.
4.2 Secure Corners
For corners or edges, ensure the tape is firmly pressed down and consider using additional small pieces to reinforce these areas for maximum adhesion.
Why Choose www.aiyatape.com for Your Anti-Slip Tape Needs?
Reliable Quality: Our anti-slip tapes are made from durable materials and undergo rigorous testing to ensure they meet the highest standards of safety and performance.
Variety of Options: We offer a wide range of anti-slip tapes in different materials, sizes, and adhesive formulas to suit various applications and environments.
Cost-Effective Pricing: Without compromising on quality, www.aiyatape.com provides competitive pricing to fit your budget.
Easy Installation: Our tapes are designed for easy installation, saving you time and effort.
Comprehensive After-Sales Support: Our dedicated service team is committed to providing excellent support before, during, and after your purchase, ensuring you have a seamless experience with www.aiyatape.com.
Explore Our Selection Today
Visit www.aiyatape.com to browse our comprehensive range of anti-slip tapes and other adhesive solutions. With www.aiyatape.com, you can enhance safety, efficiency, and professionalism in your work environment. Start your search today and discover the difference quality makes!